
These photography tips for beginners start with a simple idea: if you are learning photography, you do not need a new camera to start making stronger pictures. The fastest gains usually come from understanding exposure, finding better light and making deliberate composition choices. This updated guide expands 20 practical photography tips for beginners with realistic settings, small exercises and common mistakes to avoid. Use it as a reference, not a rigid set of rules: every camera, lens and lighting situation is different.
Use these photography tips for beginners as a practical roadmap. Start with the first four camera settings, then move to lighting, composition, focus and practice. The goal is better photographs in real situations—not memorizing one set of numbers.
Table of Contents
1. Understand the Exposure Triangle
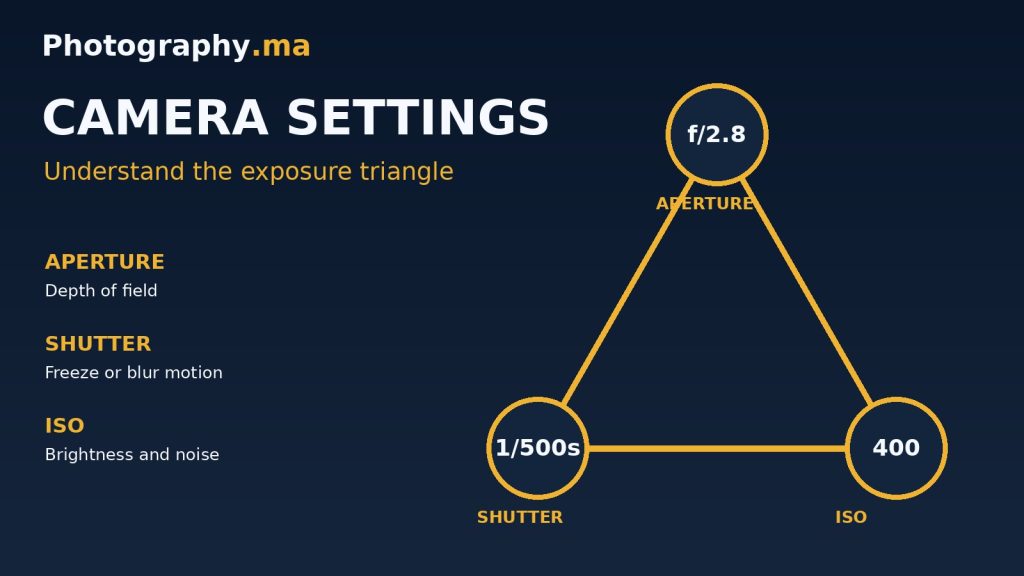
Every exposure depends on aperture, shutter speed and ISO. Aperture changes the opening in the lens and affects depth of field; shutter speed determines how long the sensor records light and how motion appears; ISO adjusts amplification and can affect noise. These settings interact, but they do not have identical creative effects. A bright landscape may call for ISO 100, f/8 and a shutter speed selected by the meter. A moving child indoors may require a faster shutter and a higher ISO instead. Start in aperture priority for stationary subjects and shutter priority for movement, then try manual exposure when you understand the trade-offs.
Practice: photograph the same scene at f/2.8 and f/8 while adjusting shutter speed or ISO to keep similar brightness. Compare the background.
2. Keep ISO as Low as Practical
Low ISO often provides cleaner files and greater dynamic range, but the lowest number is not always the best choice. If using ISO 100 forces a shutter speed of 1/15 second while you handhold a moving subject, the resulting blur is usually more damaging than modest noise. In daylight begin near your camera’s base ISO; indoors use Auto ISO with a sensible minimum shutter speed. Modern cameras vary widely, so test ISO 800, 1600 and 3200 on your own equipment instead of treating a fixed number as a universal limit.
Practice: take a sharp image at ISO 1600 and a blurry image at ISO 100. Decide which result is more usable.
3. Learn How Aperture Changes Depth of Field
A wide aperture such as f/1.8 can separate a portrait subject from the background, especially when the subject is close and the background is far away. A smaller aperture such as f/8 increases depth of field, which is useful for many landscapes and group photographs. The actual effect also depends on focal length, subject distance and sensor size. Avoid assuming that f/11 makes absolutely everything sharp: focus distance and diffraction still matter. When photographing a group, stop down enough to keep both rows of faces acceptably sharp.
Practice: focus on a nearby object and repeat at f/2.8, f/5.6 and f/11 without moving the camera.
4. Match Shutter Speed to Movement
Shutter speed controls how much motion is recorded. A starting point of 1/500 second may freeze moderate action; fast sports or birds can demand 1/1000 to 1/2000 second or faster. For still subjects, slower speeds can work if the camera is supported, but handholding limits depend on focal length, stabilization and technique. Try 1/30 second while panning with a cyclist to keep the rider relatively sharp and blur the background. Check results at full size rather than judging sharpness only on the rear screen.
Practice: capture a moving subject at 1/60, 1/250 and 1/1000 second and compare the motion.
5. Photograph the Golden Hour
The low sun shortly after sunrise or before sunset often produces warm light, long shadows and appealing separation between foreground and background. Rather than simply pointing the camera toward the sun, look for side lighting that reveals texture or backlighting that creates a rim around a subject. Expose carefully to retain detail in bright skies; use exposure compensation if your camera makes the foreground too dark or the sky too pale. Golden hour length and intensity depend on latitude, season and weather.
Practice: photograph the same subject with the sun behind you, to one side and behind the subject.
6. Work with Harsh Midday Light
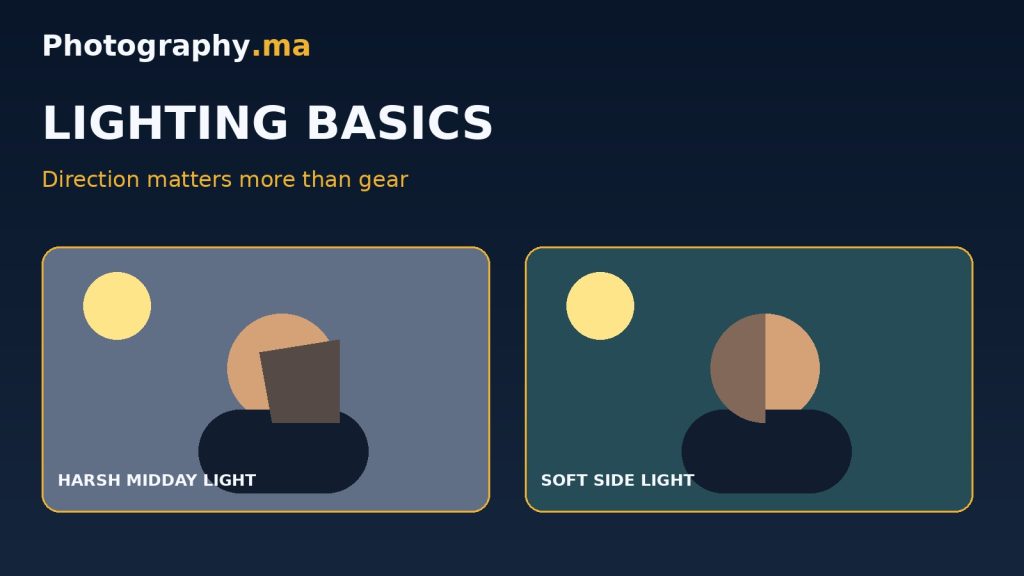
One of the most useful photography tips for beginners is to watch the light. Strong overhead sun can create deep eye sockets, hard shadows and bright highlights. You do not always need to stop shooting. Move a portrait into open shade, use a bright wall as a natural reflector, or position the subject near a shaded doorway. For architecture, harsh shadows can become graphic design elements. Watch your histogram and highlight warnings: bright clouds and white clothing may clip before the rest of the frame appears properly exposed.
Practice: compare a portrait in direct sun with the same portrait one step into open shade.
7. Use the Rule of Thirds as a Starting Point
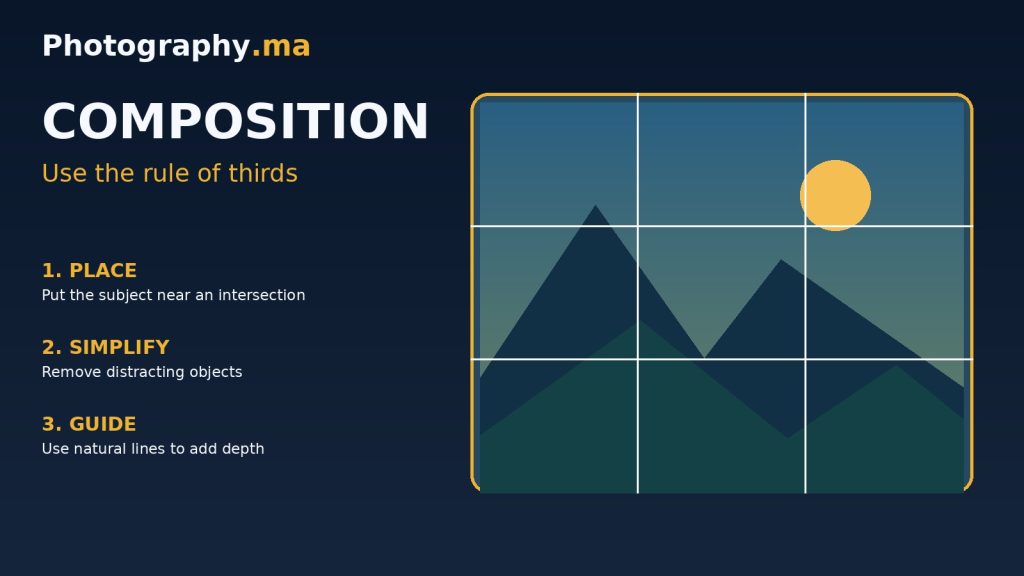
Enable the 3-by-3 grid on your camera or phone. Place a face, horizon or important object near one of the grid intersections when that helps the image feel balanced. The grid is not a law: symmetry, centered framing and strong negative space can be more effective in other scenes. Ask where the viewer should look first, then place the subject deliberately. In portraits, leaving more room in the direction a person looks can create a natural sense of space.
Practice: make one centered composition and one off-center composition of the same subject.
8. Simplify the Background
A technically sharp subject can still disappear in a chaotic scene. Scan the edges of the frame for bright signs, branches crossing faces, clutter and high-contrast patches. Often you can improve the photo by moving only half a meter to one side, lowering the camera or waiting for someone to leave the background. A longer focal length and wider aperture can help soften distant details, but composition should come first. Check the entire frame before pressing the shutter.
Practice: make three photos of the same subject, changing only your shooting position to simplify the background.
9. Focus on the Most Important Detail
For a single-person portrait, the nearest eye is usually the best focus target. For a stationary subject, single autofocus can be convenient; for motion, continuous autofocus is often more reliable. Eye-detection autofocus can help, but verify that the camera selected the correct person or animal. When using a very wide aperture, small focus errors are obvious. Take a short burst if your subject is moving and inspect the eye at 100% during editing.
Practice: take ten portraits at a wide aperture and count how many have the intended eye truly sharp.
10. Fill the Frame Without Cutting Important Details
Moving closer can increase visual impact, but avoid cropping hands, feet, wings or other meaningful details awkwardly. Think about the story: an environmental portrait may need space around the subject, while a detail shot benefits from a tighter crop. Change focal length or camera position instead of relying entirely on heavy digital cropping. If you move closer with a wide-angle lens, remember that near features may appear exaggerated.
Practice: create a wide environmental frame, a medium frame and a detail frame of the same scene.
11. Stabilize the Camera
Keep your elbows comfortably close to your body, stand with balanced feet and press the shutter smoothly. Leaning against a wall or placing the camera on a stable surface can help. Image stabilization reduces blur caused by camera shake but does not freeze a moving subject. For long exposures, use a tripod and a timer or remote release; switch stabilization settings according to your camera and lens instructions when tripod-mounted. A tripod is especially useful for night scenes and consistent compositions.
Practice: compare five handheld images at a slow shutter speed with five tripod-supported images.
12. Choose RAW or JPEG Intentionally
RAW retains more editing latitude for highlights, shadows and white balance, but requires processing and consumes more storage. JPEG is convenient, smaller and ready to share; a well-exposed JPEG can look excellent. If your camera supports RAW+JPEG, try both while learning. Avoid assuming RAW can rescue any blown highlight or completely out-of-focus image. Back up original files and export appropriately sized JPEGs for the web.
Practice: edit the same scene from RAW and JPEG, paying special attention to bright skies and shadow detail.
13. Edit for Clarity, Not for Effect
Begin with crop and straightening, then correct exposure, white balance and contrast. Adjust highlights and shadows moderately, and use sharpening with care. Excessive clarity, saturation or noise reduction can create halos and plastic-looking detail. Compare your edit with the original periodically, and view it at normal size as well as 100%. Consistent editing across a set of images often looks more professional than dramatic treatment of each individual file.
Practice: create two edits of one photo, one subtle and one exaggerated, then compare them after a break.
14. Change Your Camera Angle
Eye-level framing is familiar, but changing height can reveal new relationships between foreground and background. A low angle can emphasize a child, pet or building; a high angle can simplify a busy tabletop. Small sideways movements can separate overlapping objects. Consider perspective distortion when tilting the camera upward at architecture. Choose the angle for the story, not simply because it looks unusual.
Practice: photograph one subject from five positions before choosing your favorite.
15. Use Leading Lines Carefully
Paths, railings, rivers and shadows can guide the eye through a photograph. The most effective lines usually lead toward a subject or create a clear visual rhythm. If a line carries the viewer out of the frame without a destination, it may weaken the composition. Wide-angle lenses exaggerate the apparent convergence of nearby lines, while longer lenses compress distance. Explore both horizontal and vertical compositions to see which better supports the direction of the lines.
Practice: find a road or pathway and make one frame with the line centered and another with it entering from a corner.
16. Leave Useful Negative Space
Empty sky, a plain wall or an uncluttered background can give the subject room to breathe. Negative space is especially effective when you want to communicate quiet, scale or isolation. It also provides a practical area for text in editorial design. Make sure the empty region looks intentional rather than like a mistake. A small subject in a large frame can be powerful when its placement is precise.
Practice: photograph a single tree or person with generous open space, then try a much tighter crop.
17. Understand White Balance
Automatic white balance works well in many situations but can shift between frames under mixed light. Daylight and cloudy presets provide predictable results outdoors, while a custom Kelvin setting can help in controlled environments. Under warm indoor lighting, decide whether to neutralize the orange cast or retain some atmosphere. RAW allows more flexible white-balance adjustments afterward, but consistent settings are still valuable when editing a series.
Practice: photograph a white object using Auto, Daylight and Tungsten presets and compare the colors.
18. Track Moving Subjects with Continuous Autofocus
Continuous autofocus (often AF-C or AI Servo) updates focus while a subject moves. Pair it with an appropriate tracking area, a fast enough shutter speed and short bursts when timing is unpredictable. Modern subject-detection modes can help with people, animals and vehicles, but results vary by camera and lighting. Practice following a predictable subject, such as a person walking toward you, before attempting erratic action. Leave room in the frame in the direction of travel.
Practice: photograph someone walking toward the camera using single AF and continuous AF, then compare keepers.
19. Practice with a Specific Goal
Random shooting can be fun, but targeted practice builds skills faster. Set one constraint per session: use only one focal length, photograph in open shade, work with leading lines or shoot in shutter priority. Review the results and write down what worked. A four-week routine could cover composition, light, exposure and editing in sequence. Keep a small selection of your best images so you can see progress without becoming overwhelmed by hundreds of files.
Practice: choose one technique this week and make a ten-photo mini-project around it.
20. Review, Repeat and Stay Patient
Progress rarely comes from buying more equipment. It comes from making pictures, identifying problems and trying again. Look at your unsuccessful photos without judging yourself: was the subject unclear, the light poor, the shutter too slow or the focus misplaced? Fix one issue on the next attempt. Revisit a favorite location in different weather or seasons to understand how light changes a scene. Consistency makes improvement measurable.
Practice: select your best five photographs each month and note one strength and one improvement for each.
Beginner Camera Settings Cheat Sheet
These are starting points, not fixed prescriptions. Adjust for the light, focal length and subject movement. These photography tips for beginners work best when you adjust the suggested settings to the available light and subject movement.
Outdoor portrait
Aperture priority; f/2.8–f/4; ISO 100–400; aim for 1/250 s or faster when the person moves.
Landscape
Aperture priority or manual; f/8; base ISO; use a tripod if the resulting shutter speed is too slow.
Indoor available light
Wide aperture such as f/2.8; Auto ISO; start around 1/125 s for relatively still people, faster for children.
Fast action
Shutter priority or manual; start at 1/1000 s; continuous AF; Auto ISO; adjust based on movement and light.
Common Beginner Mistakes to Avoid
Do not insist on ISO 100 when it produces blur; do not assume f/11 makes every landscape sharp; do not leave a cluttered background unchecked; do not confuse camera stabilization with subject-motion freezing; and do not oversharpen or oversaturate an image to compensate for weak light or composition.
Frequently Asked Questions
What camera mode should a beginner use?
Aperture priority is a useful starting point for portraits and everyday scenes. Shutter priority helps with motion. Program and Auto modes are also legitimate tools when timing matters.
Is a phone enough to learn photography?
Yes. Light, composition, timing and background control transfer directly to smartphone photography. A dedicated camera mainly adds control and lens options.
Why are my photos blurry?
The most common causes are missed focus, camera shake and subject movement. Check shutter speed, autofocus target and support before blaming image quality.
Should I always shoot RAW?
Not necessarily. RAW is useful for editing latitude; JPEG is practical for speed and sharing. RAW+JPEG can help you compare.
How often should I practice?
Two focused 20-minute sessions each week can be more productive than occasional random shooting. Review a few images after each session.
Keep Learning: Recommended Photography Guides
- Camera settings for beginners
- Photography lighting setup at home
- Landscape photography tips for beginners
Further Reading from Trusted Photography Resources
For a deeper explanation of exposure, depth of field and photographic technique, explore Cambridge in Colour photography tutorials.
For practical shooting and editing ideas, see Adobe photography guides. These are external educational references, not sponsored links.
Final Thoughts
The best photography tips for beginners become useful when you apply them regularly. Better photography comes from making intentional choices. Learn to balance aperture, shutter speed and ISO; notice the direction of light; simplify the frame; and practice with one clear goal. Return to these 20 tips whenever a photograph does not look the way you imagined, then test a small change on your next shoot.
1 thought on “Best Photography Tips for Beginners: 20 Practical Lessons”